Disclaimer:
This may seem a bit long winded and bloated, I apologize in advance. You can have extremely small Alpine footprints, which are awesome things to behold, this is probably not that, but it should give you a general idea how I build my Alpine workstations. Check my old NAS post (or the NAS rebuild coming up in the future!) if you're curious about just how little you need to get a productive Alpine system together. It's also worth saying that eudev will eventually be removed and replaced with libudev-zero or mdev. I use neither of those and don't actually see any issue with udev, so I still suggest installing it at this point. At some point Alpine will replace libudev dependencies with libudev-zero and things may break at that point.
Preparing the Image
Navigate to the official Alpine ISO page and grab the standard ISO for your CPU arch. I'm doing all of this in an x86_64 qemu vm on my handy dandy Asus netbook, so I'm looking for the x86_64 image specifically. Save that file somewhere and go dig out a thumb drive. You'll need to dd if=alpine-standard-3.14.2-x86_64.iso of=/dev/sdx where sdx is your thumb drive, if you don't know it just grab it from sudo fdisk -l. Once you've written the ISO to your thumb drive plug it into your computer and boot it. The Alpine ISOs support both legacy and UEFI boot, if you boot UEFI you'll get a grub2 prompt, if you boot via legacy you'll get extlinux, but regardless the boot process will be the same-ish.
Installing Alpine
Once you've hit the TTY prompt login with root without a password, this will drop you into an almquist shell. From there getting alpine setup is really trivial. You'll run the command setup-alpine and follow through each step of the prompt. I was going to dump the output from that session in a code block below, and even add a fancy gif, but it was like 3 minutes long and far too big to justify. Also setup-alpine is decently well documented so you likely don't need help there. Besides by the time you're reading this I'll have spent two nights just trying to correct packages so that my blog's docker container would build, I'm all out of brain juice now.
Once setup-alpine has done its thing reboot your computer and remove the thumb drive, it should boot you into the new installation. Just log back in as root and we'll start the fun.
Base Packages
Okay, I'm going to provide this two ways, below is a big old line of apk packages, you can install all of them all at once and move on, or if you'd like I break them out into groups and explain what they do. More or less what we're setting up is the basic framework to get things you expect working, you know, X11 & wireless networking, things that make a desktop install feel less like a server.
TL;DR: This post is too long winded, gimme the packages!
echo "http://dl-cdn.alpinelinux.org/alpine/edge/main\nhttp://dl-cdn.alpinelinux.org/alpine/edge/community\nhttp://dl-cdn.alpinelinux.org/alpine/edge/testing\n" > /etc/apk/world
apk -U -a upgrade
apk add xorg-server xorg-server-common xorgproto xf86-input-libinput xf86-input-synaptics xf86-video-intel dbus dbus-x11 xinit xterm eudev hwids elogind polkit polkit-common polkit-elogind pulseaudio pulseaudio-equalizer pulseaudio-utils pulseaudio-ctl pulseaudio-alsa alsa-plugins alsa-tools alsaconf networkmanager networkmanager-elogind networkmanager-l2tp networkmanager-openvpn wpa_supplicant iwd syslog-ng logrotate cpufreqd tlp acpid sudo findutils util-linux-misc usbutils coreutils iproute2 pciutils pm-utils dateutils htop font-iosevka-nerd font-noto font-noto-emoji ttf-freefont unifont
setup-xorg-base
rc-update add alsa default
rc-update add dbus default
rc-update add udev default
rc-update add udev-postmount default
rc-update add udev-trigger default
rc-update add networkmanager default
rc-update add iwd default
rc-update add crond default
rc-update add syslog-ng boot
If you ran this, I appreciate your trust and confidence. You'll (hopefully) be able to either enable a greeter and launch into your favorite desktop, or add a couple of .rc files to get xinit working at this point. Good luck!
Right so first things first, you need to enable your packaging repos, I like bleeding edge things because debugging issues with your own laptop is a fun learning experience. If you're less crazy than that you can just enable edge main and community to reduce all of the scary problems by 10x, just watch out for big python upgrades, they're no fun. Pop open /etc/apk/repositories in your favorite text editor (vi is available in the base install, but you could also apk add mg if you're looking for a more emacs experience), then just delete everything and replace it with this. If you want the latest stable version just replace edge with v3.15.
http://dl-cdn.alpinelinux.org/alpine/edge/main
http://dl-cdn.alpinelinux.org/alpine/edge/community
http://dl-cdn.alpinelinux.org/alpine/edge/testing
And make sure you update and get a quick upgrade out of the way, that'll prevent issues from cropping up.
apk -U -a upgrade
Now onto the video and input packages. You'll notice that there is no xf86-input-keyboard or xf86-input-mouse. This is because both are no longer being maintained and have been removed from the Alpine repos! The old documentation still suggests them, but they've both been replaced by libinput. If you've got a touch pad you'll still want the synaptics package. Your xf86-video will be dependent on your hardware, since I'm using an Intel Celeron I'm going to need to intel video package, on my droid I need xf86-video-omap because it uses an omap armv7 cpu, a Chromebook C201 needs Mali drivers for its rockchip cpu which would be mesa-dri-gallium, mesa-dri-classic, and xf86-video-fbdev, it all just depends.
apk add xorg-server xorg-server-common xorgproto xf86-input-libinput xf86-input-synaptics xf86-video-intel dbus dbus-x11 xinit xterm
(If you really don't care, just run this command sudo apk add $(sudo apk search xf86-video | awk -F'-' '{print $1"-"$2"-"$3}') and it will install ALL of the video drivers. As my dad is fond of saying, we can always just apply "brute force and ignorance" to solve our problems.)
You need to make sure you install eudev, elogind, and polkit. Without these you won't have working input after X starts. eudev and elogind are Openrc ports of udev without the systemd dependencies. You could try and use mdev, or libudev-zero, both of which aim to accomplish the same thing, but I've had a lot less luck working with those than I have had with the purpose built ports. I personally suggest using networkmanager, you don't have to, but if you do you'll want the elogind package for it as well. More or less all of this will ensure that your non-root user is able to interact with privileged processes correctly.
apk add eudev hwids elogind polkit polkit-common polkit-elogind
Great now that we've got the input and video stuff out of the way lets add audio. There's nothing crazy here, I tend to like a combination of Pulseaudio and Alsa, it just seems to work really well for me, but I've heard that Pipewire is the new hotness and that it works even better. Feel free to ignore me entirely and go use Pipewire, or have no audio, this is your workstation after all isn't it?
apk add pulseaudio pulseaudio-equalizer pulseaudio-utils pulseaudio-ctl pulseaudio-alsa alsa-plugins alsa-tools alsaconf
And then networking, as implied above, networkmanager is pretty decent, but you can just as easily stick with only wpa_supplicant and manage things through /etc/network/interfaces.
apk add networkmanager networkmanager-elogind networkmanager-l2tp networkmanager-openvpn wpa_supplicant iwd
Once you've got networkmanager installed you'll need to configure it, this configuration has worked flawlessly for me across multiple systems.
[main]
dhcp=dhcpd
plugins=keyfile,ifupdown
[device]
#wifi.backed=wpa_supplicant
wifi.backend=iwd
[ifupdown]
managed=true
Additionally dropping some shallow rules in /etc/network/interfaces makes sure the really important stuff comes up the right way if networkmanager acts weird.
auto lo
iface lo inet loopback

auto wlan0
iface wlan0 inet dhcp

auto eth0
iface eth0 inet dhcp
Finally you'll probably also want to have these packages. They're only here to help you debug problems you run into and make things run like you'd expect. /var/log/messages will record most things, but more verbose logging is better in my mind, and anyone coming from a journalctl world might expect a little bit more than Alpine provides out of the box. Additionally adding these ensures you'll have access to GNU tools you'd normally expect to have in most distros. None of these are strictly necessary but could be nice to have.
apk add syslog-ng logrotate cpufreqd tlp acpid sudo findutils util-linux-misc usbutils coreutils iproute2 pciutils pm-utils dateutils htop
Oh I almost forgot fonts. Fonts are nice, here's what I use, most of them are there so that emoji's and unicode characters show up in the terminal. Add or remove from it as you desire, fonts are a luxury!
apk add font-iosevka-nerd font-noto font-noto-emoji ttf-freefont unifont
Once we've got all of the packages installed we need to run setup-xorg-base and then enable a few services.
setup-xorg-base
rc-update add alsa default
rc-update add dbus default
rc-update add udev default
rc-update add udev-postmount default
rc-update add udev-trigger sysinit
rc-update add crond default
rc-update add syslog-ng boot
If you're going to use NetworkManager you'll also want to add these.
rc-update add iwd default
rc-update add networkmanager default
If you're just sticking with wpa_supplicant make sure it's part of the default level. (And if you're also using networkmanager make sure you remove iwd and swap it with wpa_supplicant too!)
rc-update add wpa_supplicant default
And if you're working on a laptop (as I've been boldly assuming you have been) you'll likely see greatly improved battery life with these services enabled.
rc-update add acpid default
rc-update add cpufreqd default
rc-update add tlp default
User Configuration
Obviously you don't want to run everything as root, and if you do please don't tell me, my poor heart can't handle it, ignoring that horrible thought we'll talk a little bit about configuring our user.
You probably expect to have things like usermod available, but Alpine's busybox base doesn't provide them, if you want them just apk add shadow. Actually, this is probably a good time to mention again that the default shell is Almquist, so /bin/ash. If you want bash, zsh, fish, or something more esoteric go ahead and apk add that before you setup your user.
Without shadow:
adduser -h /home/durrendal -s /bin/ash durrendal

With shadow:
useradd -c "durrendal" -m -s /bin/ash -U durrendal
And then make sure that your user is in these groups (tty video audio netdev plugdev)
Without shadow:
for group in tty video audio netdev plugdev; do addgroup durrendal $group; done

With shadow:
for group in tty video audio netdev plugdev; do usermod -a -G $group durrendal; done
With that our user should be ready to go, everything after this is more geared towards a specific style of graphical environment. I personally switch between i3 and XFCE most of the time, so I'll cover setting up both. One with a greeter and one without. It looks like herbstluftwm is also now packaged, which is super exciting if you ask me, I'm and absolute fan of herbst! You can likely sub the i3 config for herbst if you so desire.
Flavor: i3wm
Getting a working i3 installation is pretty light, you really just need i3wm or i3wm-gaps. Maybe you also want i3blocks and i3lock as well and a launcher like rofi or dmenu. Go nuts here, what packages you add outside of the basics aren't important, it's more how you configure it.
apk add i3wm i3blocks i3lock dmenu
For i3 I like to do a simple xinit login, that requires a couple of configurations in your user profile, which in the end are dead simple. That's why you use i3 though, because it just works, and every facet of it is legible, lightweight, and turnkey. Create a .xinitrc file in your home directory and populate it with this. This will ensure that if you have a .Xresource file it will populate it, and then it'll start i3wm for you.
[[-f ~/.Xresources]] && xrdb -merge ~/.Xresources
exec i3
Then inside your .profile you'll want to make sure this line exists. This will startx if you login on tty1 but otherwise ignore it. This is great if you happened to break something and need to still get TTY access, or if you ssh into your system regularly.
if [[-x $DISPLAY]] && [[$(tty) = /dev/tty1]]; then
    exec startx;
fi
This should be all you really need to do short of configuring i3 itself. If you'd like you can use Atentu to populate your i3block with system information. I recently setup an old Pentium based All-In-One that way and on a bigger screen I feel like the result is actually pretty good. There's no way Atentu would work like this on my droid though.
Flavor: xfce4
I usually grab i3 for low resource systems, but sometimes you need a full desktop environment, when that's the case XFCE is my immediate go to. It's lightweight but feature rich, lots of little sleek plugin widgets so you don't have to hand configure your desktop bar. In my mind it strikes a perfect balance between configurable and extensible without causing too much overhead. For anyone who rices, I really love seeing your work, but when I jump into an XFCE desktop it's so that the system gets out of my way so I can just work. XFCE does all of that while still running inside of a 350mb RAM footprint!
apk add lightdm lightdm-gtk-greeter xfce4 xfce-polkit libxfce4ui xfce4-appfinder xfce4-battery-plugin xfce4-notifyd xfce4-panel xfce4-power-manager xfce4-pulseaudio-plugin xfce4-screensaver xfce4-screenshooter xfce4-session xfce4-settings xfce4-terminal xfce4-whiskermenu-plugin arc-dark papirus-icon-theme
This is more or less what I use most of the time with xfce, lightdm for a greeter, lots of little widget plugins to handle system configuration, arc-dark and papirus icons. The result is a sleek dark theme that I adore. This meshes very well with networkmanager specifically, the xfce4 widget is just a breeze to use when setting up l2tp vpn profiles or bouncing around between networks, which is what I'm dealing with when I grab my netbook most days. From a configuration standpoint there really isn't that much more to do after installing things, go tweak settings after you enable the lightdm greeter and login.
rc-update add lightdm default
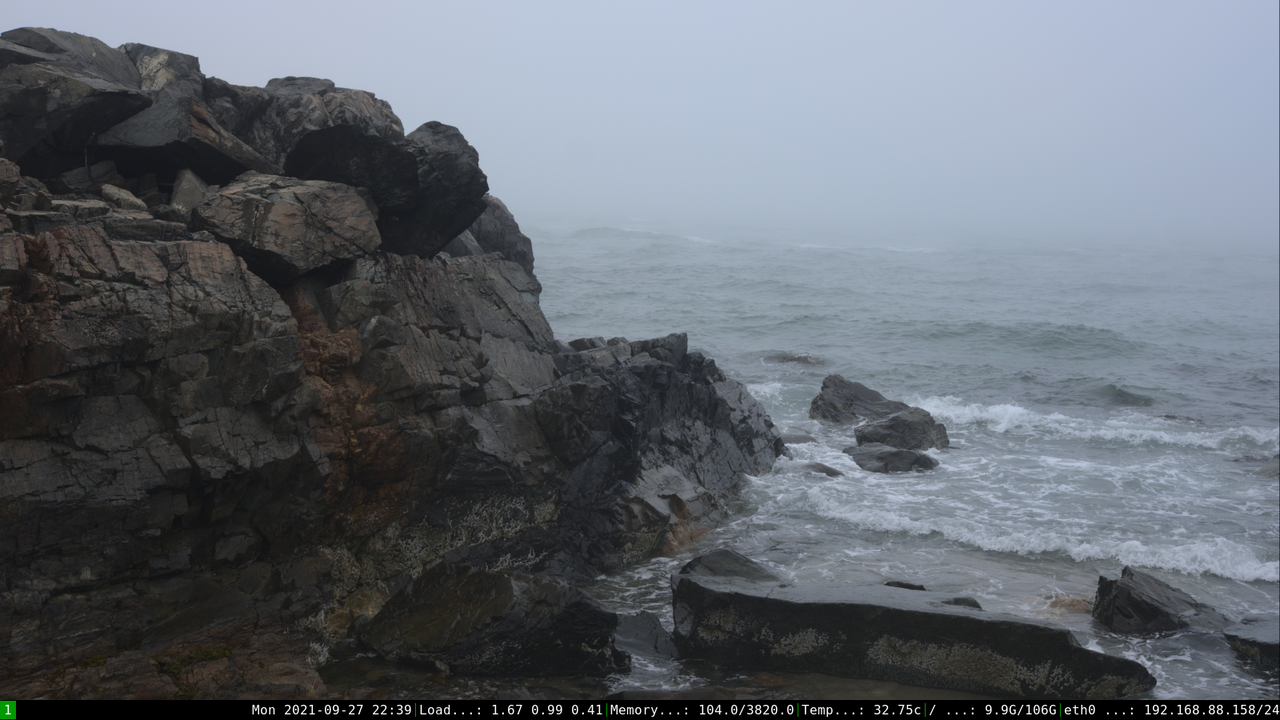
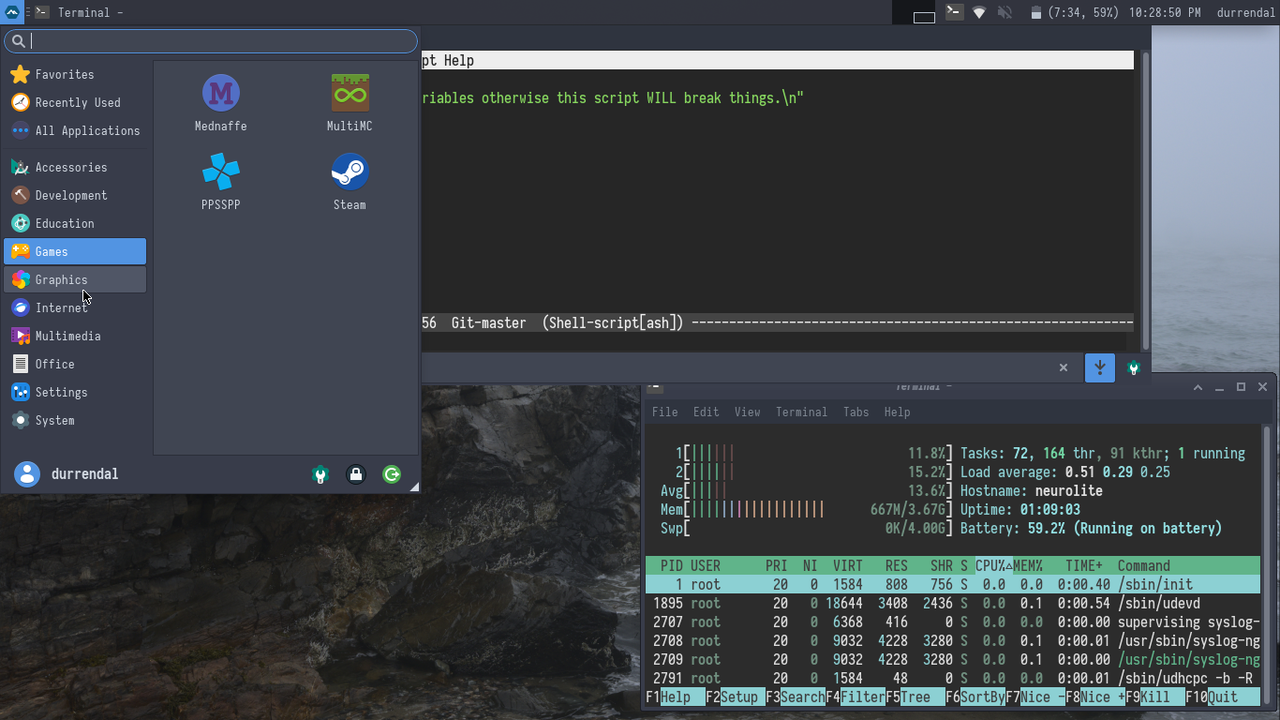
I use XFCE4 on my netbooks, so here's a picture of Neurolite, which also happens to be the system I used to pen most of the post. If you're curious the moody seashore is off the Marginal Way in Ogunquit Maine.
Final Thoughts
A big shout out and thinks to acdw, lucidiot, and mio who inspired this post. I've been answering all kinds of really awesome questions about getting Alpine systems working, packaging things for Alpine, and just general tinkering. Shoutouts are 100% deserved here because these cool people are doing cool things.
I wrote this entire post primarily because acdw asked and expressed interest in getting an Alpine install going. I hope it helps him get one going so he can join the fun! You should definitely check out his blog, seriously go look at that font and color scheme, it's absolutely delightful! The real gem there is autocento seriously go check it out, get lost in some really good poetry, you will not regret it!
Mio just recently managed to get Alpine Linux on a Chromebook C201, you can find that repo here it's really cool and a synthesis of a custom veryron kernel build and different disparate Debian and Arch based guides, plus lots of late night debugging sessions. It was a ton of fun helping get that project off of its feet. Mio has started dabbling in with Alpine packaging because of this too! No joke, super excited about that.
And you know what's even more exciting?! Lucidiot IS an Alpine package maintainer now, I have successfully corrupted him and he's nuked his X201 and rebuilt it from scratch as an Alpine setup, and very very quickly jumped onto the packaging bandwagon. Look at this, he's already got six packages under his belt. His post about Tank is well worth a read especially if you're interested in setting up LUKS or using LVM, something I skipped over entirely here since I just wanted to provide a simple setup to get things working. You should definitely consider LUKS as a next step for your own benefit!
I'm very happy to see both Mio and Lucidiot getting more into Alpine and getting excited about packaging. They've also been super helpful testing out toAPK for me, and I've actually got open issues on it for broken things! Usually I wouldn't be excited about broken things, but it feels great knowing that something I wrote is being used and people like it enough to report and help improve it!
Closing
Whelp this has been super long and that's probably quite enough out of me.
Hopefully someone finds this helpful! I've been talking a lot with friends about the various Alpine systems I've built and use day to day, so hopefully condensing some of that trial and error knowledge I've accrued year over year into this goofy guide will be useful! If you have suggestions, additions, complaints, or anything else drop me a line on IRC or via email. Stay tuned for an ongoing NAS rebuild, CI/CD rebuilds, and an Alpine watch experiment!